Using the Text Editor
Tools for Editing Text
The options you have available in the text editor will depend on your level of permissions. This section will cover the possible tools you might see in your text editor in the order they appear. If you forget what an icon is, a tooltip will appear when you hover over the icon:


1. Undo
Undo the previous action.
2. Redo
Redo an action if you accidentally click "undo."
3. Formats
The format drop-down allows you to stylize text by using headers, designated font and button styles, image styles, and more.
To apply a style to text:
- Select the text with your cursor and then select the desired style from the drop-down box.
- If you are editing in the On-Page Editing mode, you will have to click out of the text box in order to see the style applied.
To remove a style, highlight the text and select the style again from the drop-down. You will see a dark line to the left of the selected style when the style is applied, and no dark line if no style is applied. Alternatively, you can select the text and click the "Clear Formatting" button to remove all styles with one click.
4. Bold
Select text and click the "Bold" button to make text bold.
5. Italic
Select text and click the "Italic" button to make text italic.
6. Insert/Edit Link
Select the text or image you'd like to link, and click "Insert/Edit Link" to add the URL.
7. Remove Link
Select the linked text or image and click "Remove Link" to remove the link.
8. Anchor
Anchors are used when you'd like to link to a specific place on the page. Anchor links are used for the "jump to" section at the top of this page.
Place your cursor at the spot on the page you'd like to be able to link to. Click the "Anchor" tool and you will be prompted to enter an id. You can name this anything, as long as it's different from every other anchor on the page.
When you add the link to the text, use a # in the link followed by the id. For example, if the anchor was named "anchor", you'd enter "#anchor" as the link text if the link is on the same page.
If you're linking to an anchor from a different page, you will want to use the full page URL followed by the # and anchor id as the link. For example, to link to this anchor from a different page, you would format the URL like this: http://mankato.mnsu.edu/it-solutions/help-support/website-resources/using-the-text-editor#anchor.
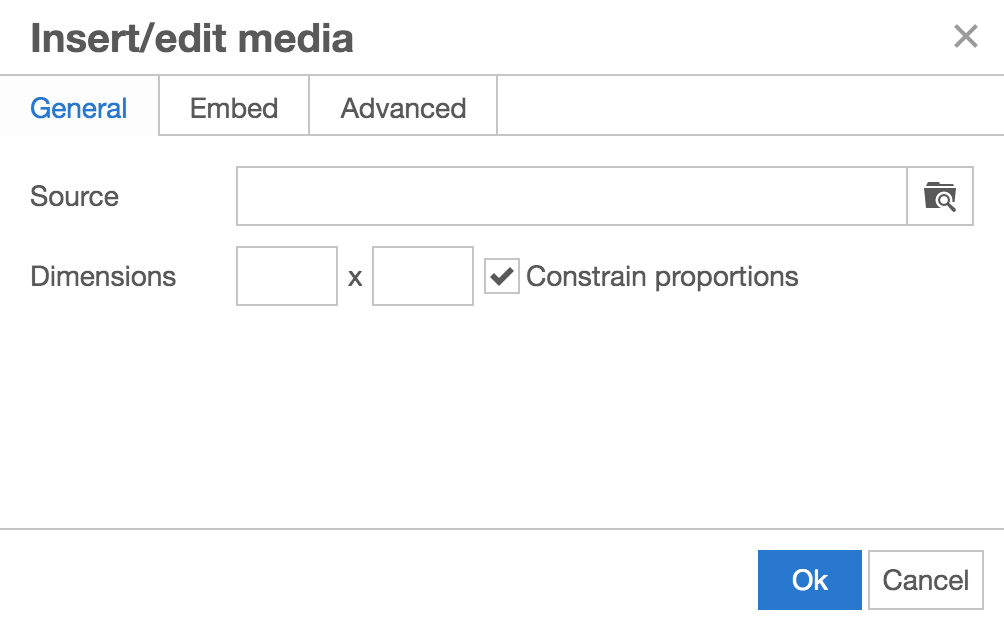
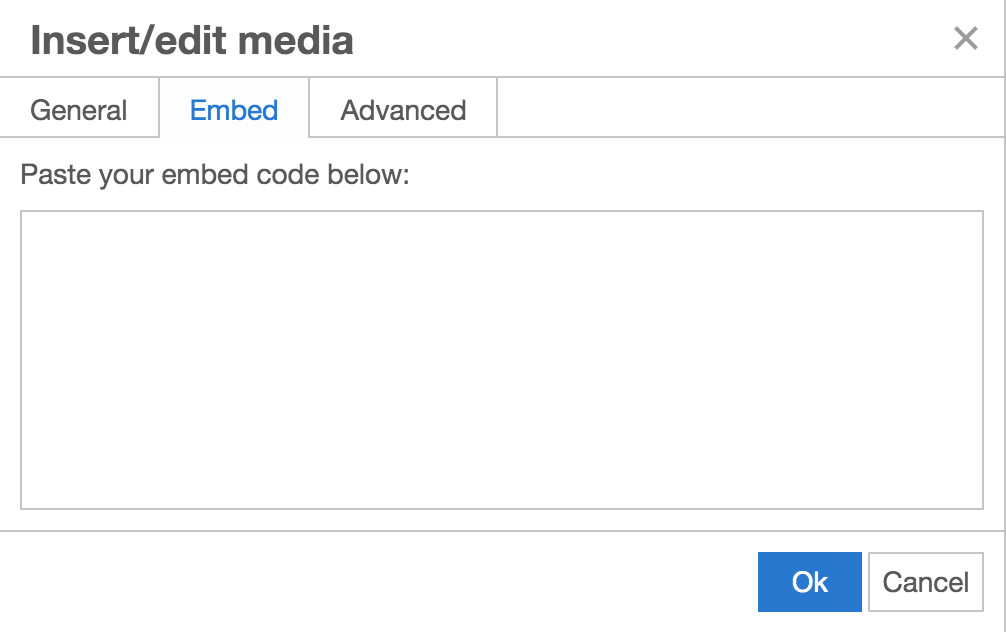
9. Insert/Edit Media
Click this tool to insert media from another website, such as YouTube. There are two ways to insert media. You can insert it using a source URL or an embed code.
Use the "General" tab to insert media from a URL. Paste the URL into the "Source" dialog box. Adjust the dimensions if necessary.
Use the "Embed" tab to inset media using an embed code. Please note that if an embed code contains javascript, the javascript will automatically be removed due to security issues with some javascript. If you need to embed javascript, please submit a ticket to the IT Solutions Center for custom development assistance.
10. Insert/Edit Image
Place your cursor in the text editor where you'd like the image to appear. Click the "Insert/Edit Image" tool.
You can choose to browse for a file that has already been uploaded to EpiServer by clicking the folder icon next to the "Source" dialog box. Alternatively, you can select the "Upload" tab to upload a new image.
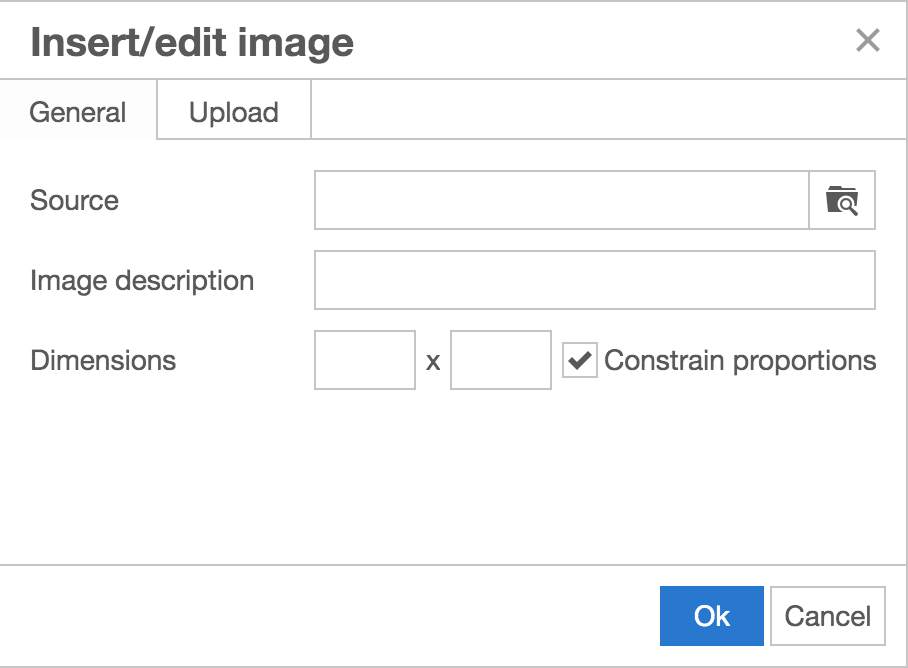
Once your image is uploaded, enter descriptive text in the image description box. It is important not to skip this step because this is the description that screen readers will read to visually impaired website users. Including an image, description makes your image ADA compliant and also adds to your website's search engine optimization terms.
Adjust the dimensions if necessary, and then click "Ok" to insert the image.
11. Image Editor
The image editor allows you to crop, resize, or transform an image within Episerver. You can save the edited image as a copy, or replace the original image. It is best to save the image only at the maximum size it will be displayed on the website in order to save space on the server and help our pages load faster.
12. Personalized Content
This is a functionality that will be useful in the future, although we don't have the full capabilities yet. We will be releasing personalization functionality once the website is fully transitioned from the old platform into EpiServer.
To prepare for this type of functionality, you can add categories to each page on your website to identify the audience, location, or topic for that page. In the future, you will be able to serve different information to different people based on who they are and what they've shown interest in.
13. Bullet List
Use this tool to create a bulleted list. Place your cursor where you want to write the list. Click "Return" on your keyboard after each list item in order to add another bullet. Once the list is complete, click "return" twice to end the list.
14. Numbered List
Use this tool to create a numbered list. Place your cursor where you want to write the list. Click "Return" on your keyboard after each list item in order to add another number. Once the list is complete, click "return" twice to end the list.
15. Decrease Indent
Move indented text one indent to the left. Removing all indents will align the text to the left side of the page.
16. Increase Indent
Use this tool to increase the indent of the text. This paragraph uses indented text, which applies to the entire paragraph, not just the first sentence.
17. Horizontal Line
Clicking this tool inserts a horizontal line, which can help divide sections of text. A horizontal line appears like this:
18. Table
Use this tool to insert a table. Comprehensive instructions on how to utilize tables can be found on the tables page.
19. Find and Replace
Use this tool to search for all instances of a word within the text editor and replace it with a new word.
20. Fullscreen
Use this tool to expand the text editor workspace to fullscreen.
21. Clear Formatting
Select content within the text editor and then press the "Clear Formatting" button to remove all styles or additional formatting that may be in the code.
22. Source Code
This allows you to view and edit the source code in the content area. This feature is only available for select users.
23. Question Mark Icon
Click this button for a list of quick key combinations that can be used when editing in the text editor.